A content type can be a form, a document template you want to use to gather information. Behind the scenes, a content type in SharePoint is a reusable collection of metadata (columns), workflows, and behavior settings for items in a list or library. Here is a step-by-step guide to create a content type in SharePoint Online.
Create
To create a content type that will be available for all lists and libraries in your site collection, navigate to Site Settings. Ensure you have appropriate permissions (Site Owner or Admin).
- Click on the Settings icon (gear icon) in the top-right corner.
- Select Site information > View all site settings.
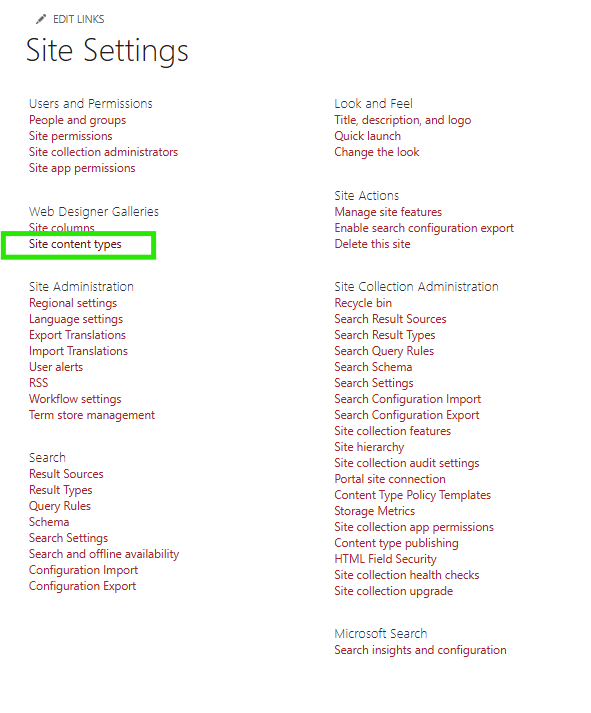
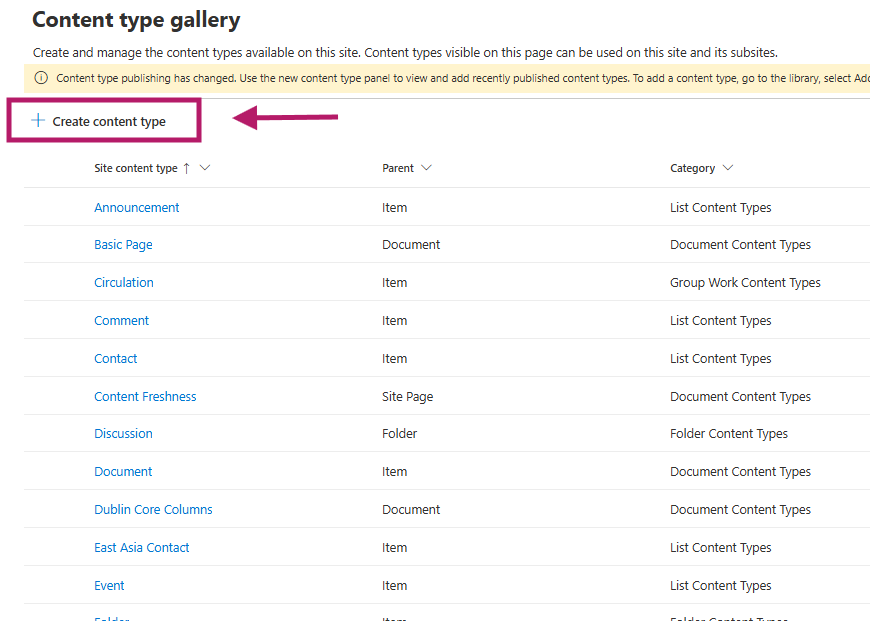
In the site settings select Content Types. Click on Create.
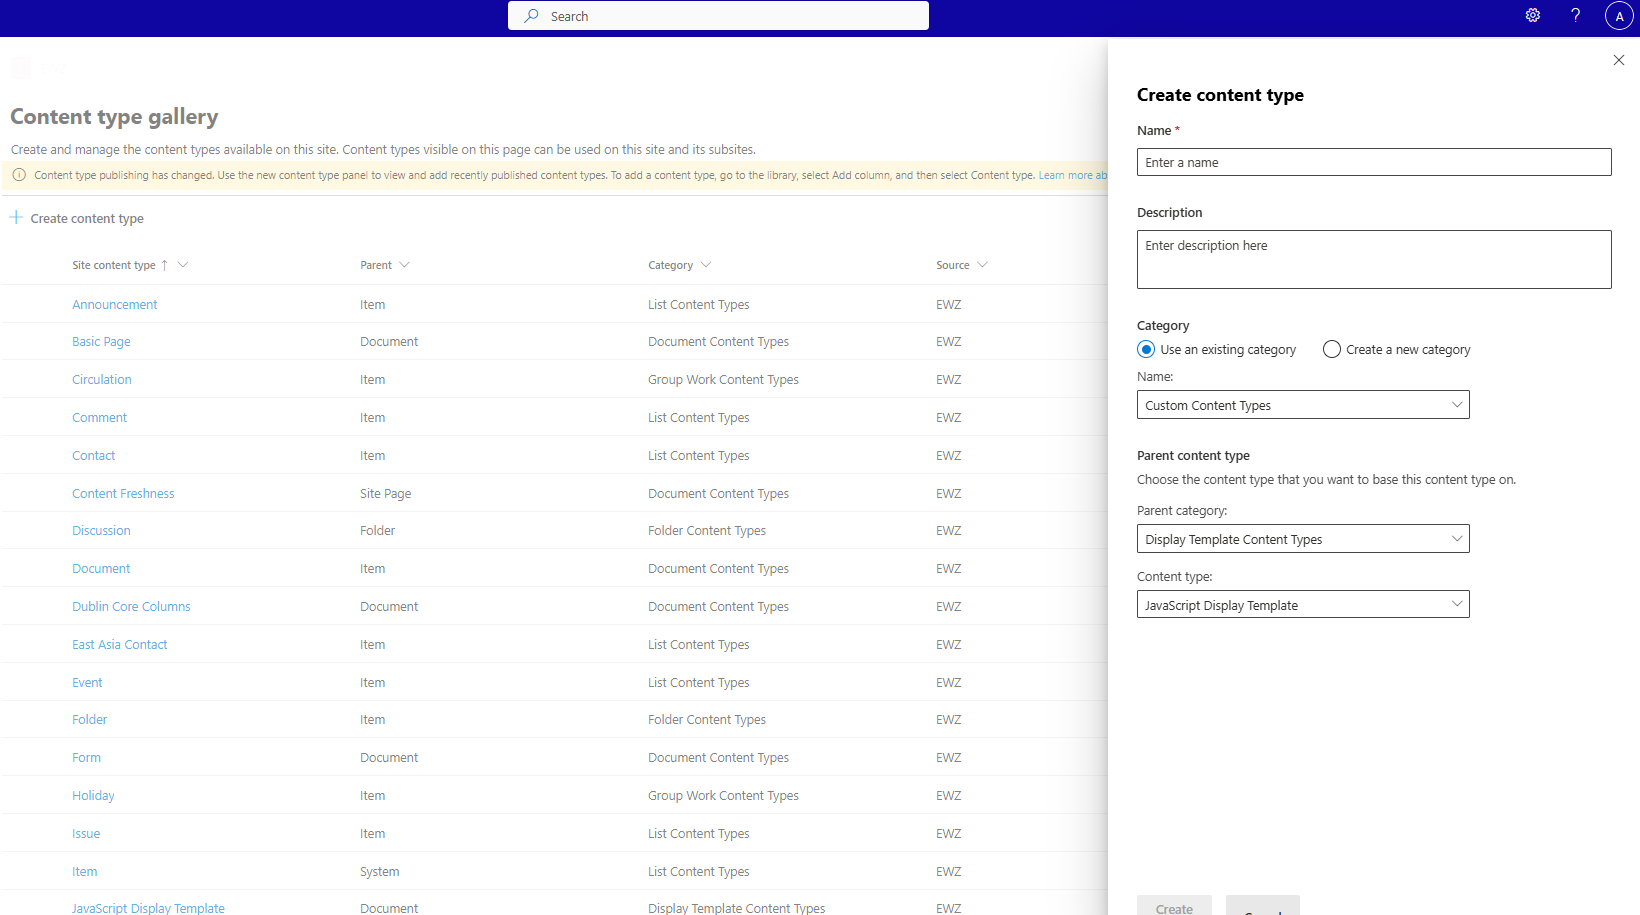
A side menu will open. Enter name, description, category and parent content type. Parent content type is especially important because it decides if your content type becomes available on your list or library. For example, if you choose a Document as your parent content type, your custom content type can be added to document libraries but not lists. If you choose an Item as your parent content type, your custom content type will be offered in lists.
Once the content type is created, add the columns/properties that you need.

Now that your content type is ready, you can add it to your list or library and start using it.
Add the Content Type to List or Library
First of all, make sure you have enabled content type management in your library.
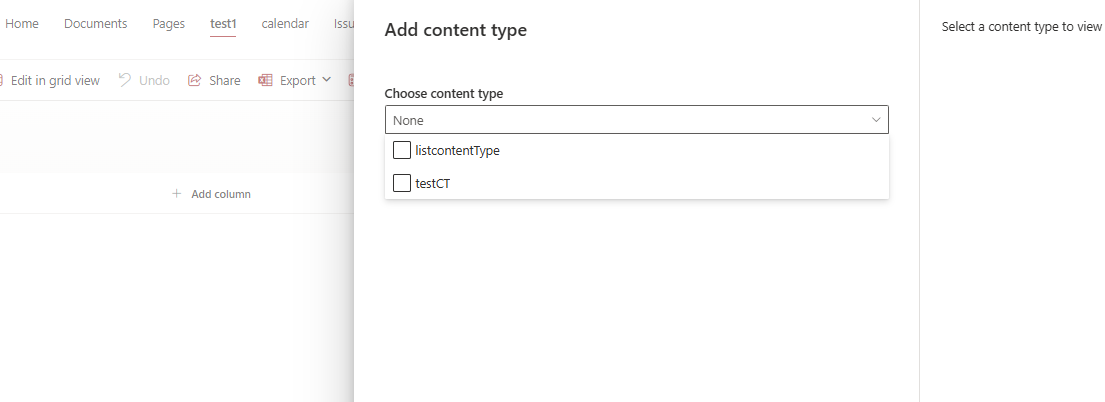
If the content management is enabled, go to your list or library and click on Add column. Scroll to the bottom of your column list and select Add a content type
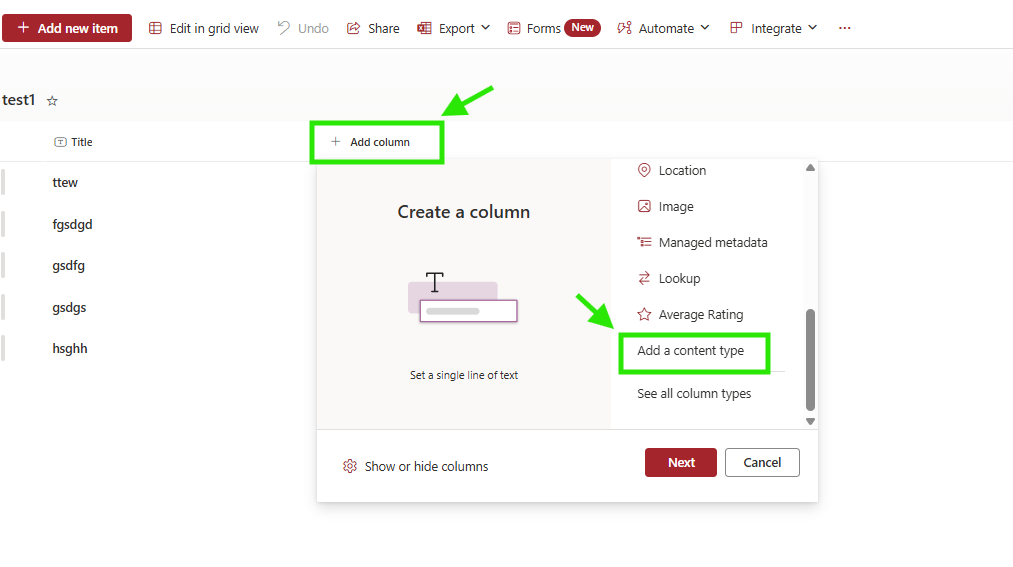
Select the content type that you created.
See Also
Enable content type management
Add content type using Powershell and CSOM